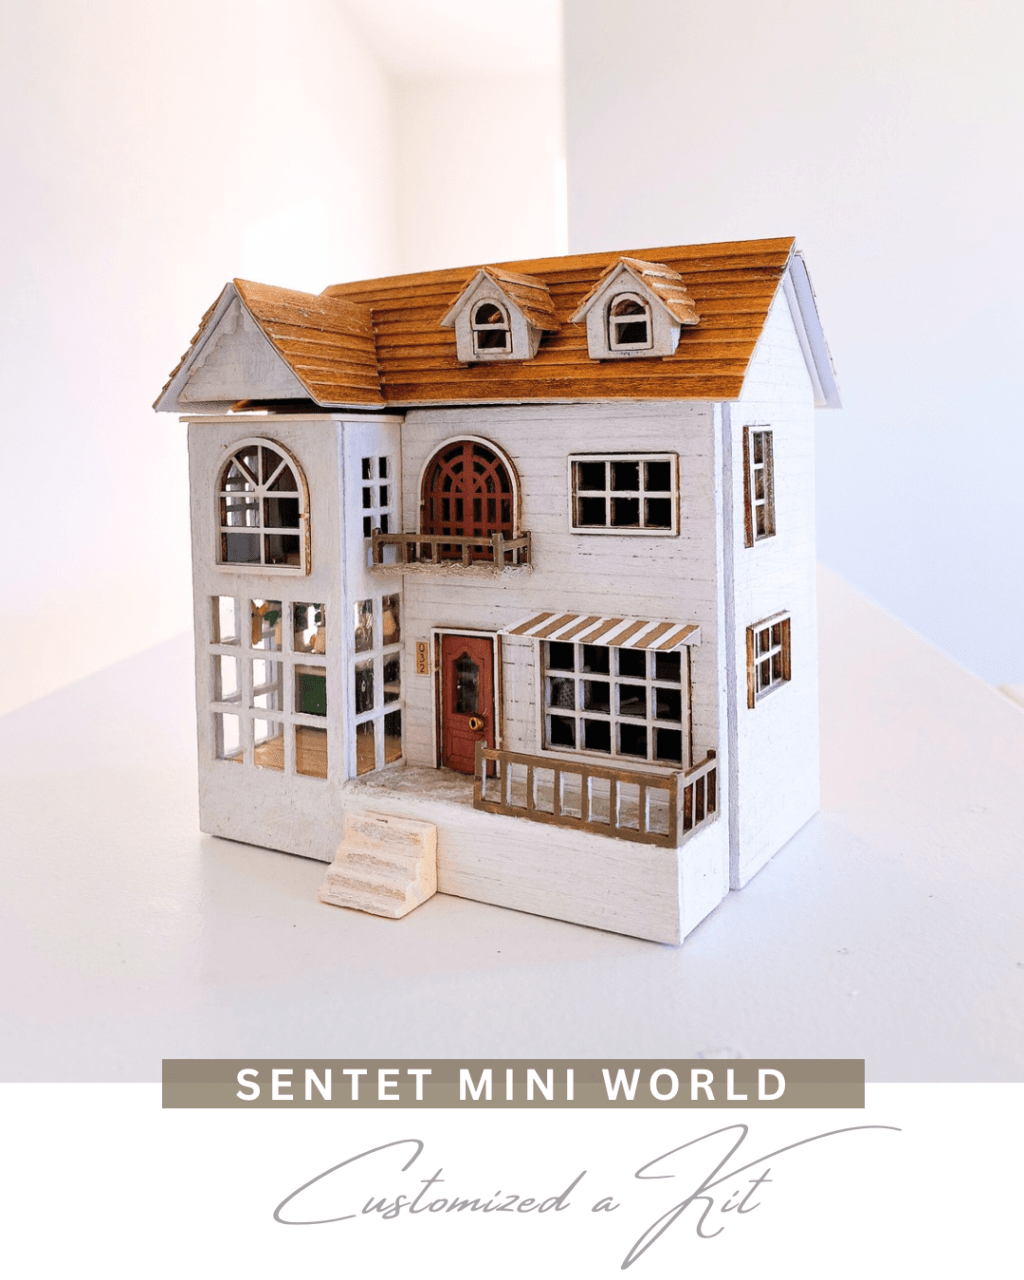
Embarking on a new dollhouse project is always exciting, but customizing a pre-made kit to create a truly unique space is an even greater challenge. In this blog post, I’ll share my experience transforming a DIY dollhouse kit into a personalized haven. From altering the layout to adding intricate details, this project has been a rewarding learning experience.
The Transformation Begins
The starting point for this project was a DIY dollhouse kit that offered a solid foundation but lacked the personalized touch I envisioned. To bring my vision to life, I focused on several key areas:
- Color Palette: I swapped out the original purple color scheme for a classic white and brown combination, creating a timeless and elegant atmosphere.
- Rooftop Retreat: The kit’s original roof was lackluster, so I added roof tiles (veneer made) for a more realistic and visually appealing look.
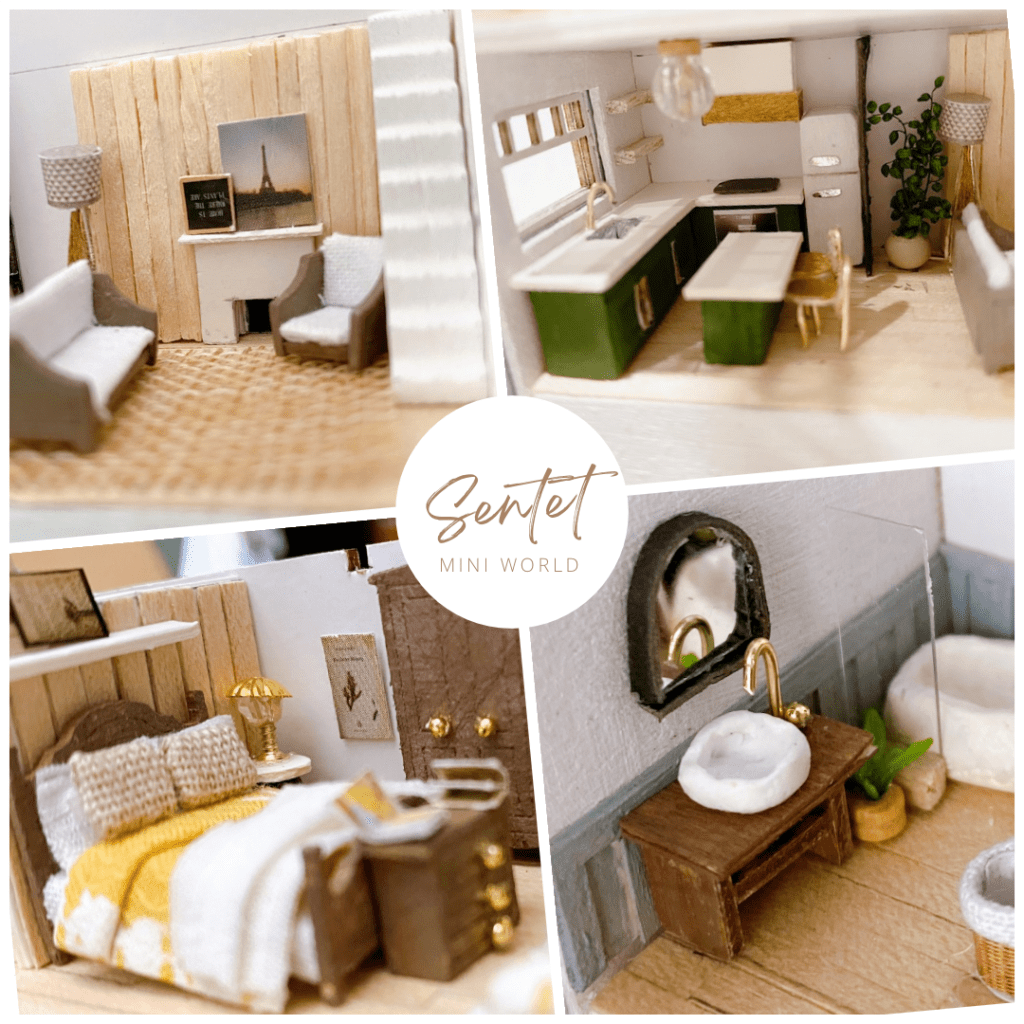
- Floor Plan Refinement: To optimize space and functionality, I moved the staircase from left to right, creating a more open kitchen area. I also transformed a small plant nook into a cozy reading nook.
- Kitchen Upgrade: The kitchen received a major overhaul with an L-shaped counter, a stylish island, and additional storage space.
- Living Room Transformation: I traded the original TV for a wood-paneled accent wall and a mini fireplace to create a warm and inviting living space.
- Bathroom Makeover: A bathtub replaced the shower, and the bathroom was relocated to a corner for better space utilization. I also added a two-tone color scheme for visual interest.
- Bedroom Refresh: The bedroom received a similar wood-paneled accent wall, along with new bedding and wardrobe for a cohesive look.
- Outdoor Oasis: I simplified the front porch railing and added plants and chairs to create a welcoming outdoor space.
Lessons Learned:
This project has been a valuable learning experience. I’ve discovered that smaller scales require precise attention to detail and that material selection is crucial for achieving the desired look. I’ve also gained a deeper appreciation for the intricacies of dollhouse design and construction.
Materials and Tools:
- DIY Dollhouse Kit: Diy dollhouse kit
- Materials: Veneer, thick paperboard, acrylic paints, balsa wood (for tiny details)
- Tools: Cutting tools, glue, paintbrushes
Customizing a DIY dollhouse kit has been a rewarding journey filled with creativity and problem-solving. I’m thrilled with the final result and look forward to sharing more of my dollhouse adventures in the future.

Leave a comment