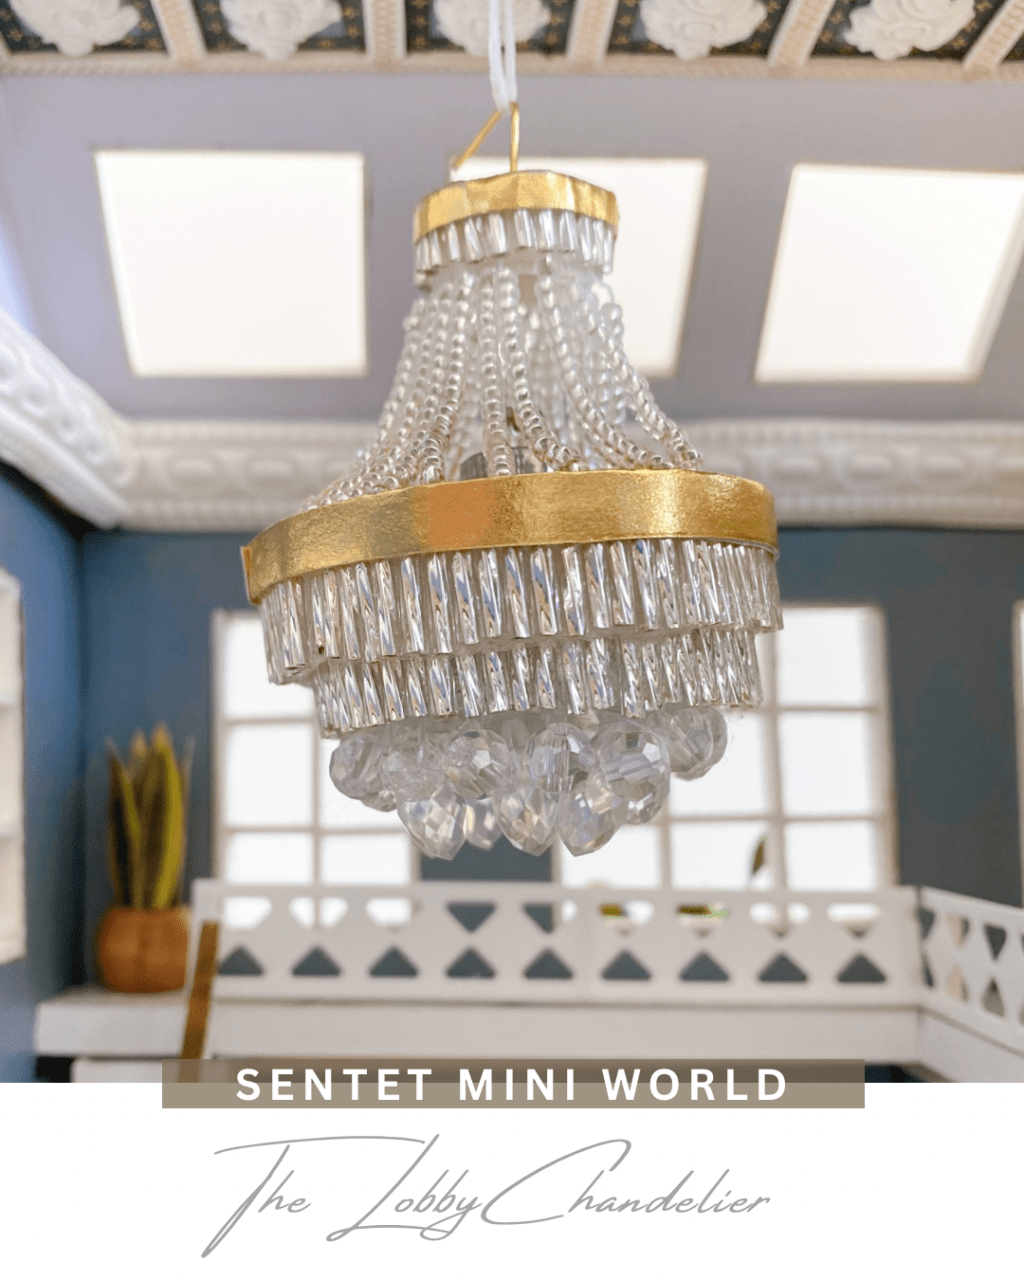
Have you ever been mesmerized by the glittering spectacle of a grand chandelier in a luxurious hotel lobby? If so, you’ll understand my desire to bring that same dazzling touch to my miniature world – a dollhouse chandelier! In this post, I’ll share my journey of creating a vintage-style chandelier, complete with tips, tricks, and lessons learned along the way.
Spoiler Alert: Yes, I built it! While the process had its ups and downs, even tempting me to give up at times, the final product is a charming addition to my dollhouse. More importantly, the experience gave me the confidence to tackle future miniature projects.
Unveiling the Magic: Materials and Techniques
This project is perfect for anyone who loves a touch of DIY magic and eco-friendly crafting. Here’s what you’ll need to bring your own miniature chandelier dream to life:
- Recycled Materials: Embrace your inner sustainability champion! I used a plastic box cover to create the chandelier’s main structure, offering a cost-effective and eco-friendly approach.
- Bead Bonanza: Sparkling beads are the heart of any chandelier! I found beautiful tube-shaped beads that added an elegant touch with their silver to semi-transparent gradient. These beads formed the bulk of the chandelier’s body, along with additional round and waterdrop-shaped beads for the bottom section.
- From Thread to Wire: A Lesson Learned: While I initially used sewing thread to assemble the chandelier, it proved to be a bit messy and challenging to control. A smarter option, which I’ll definitely use next time, is thin wire for a sturdier and more manageable construction.
- Chain Reaction: The chains hanging from the top of the chandelier add a touch of whimsy and sophistication. Here again, I used sewing thread and small beads to create them. While the result looks great, thin wire would be a more practical choice for future projects.
- Light it Up! To complete the enchanting effect, I incorporated a wireless LED light inside the chandelier, creating a warm glow that elevates the entire dollhouse scene.

Suppliers’ Corner(Amazon link included):
All types of beads used in this pendant:
- Top chain beads: https://a.co/d/0duw5m5D
- Tube beads: https://a.co/d/0bUvYdoj
- Bottom beads: https://a.co/d/06TuxJfR
Metal washi tape:https://a.co/d/07H8GD1o
Wireless LED light: https://a.co/d/036iiwaf
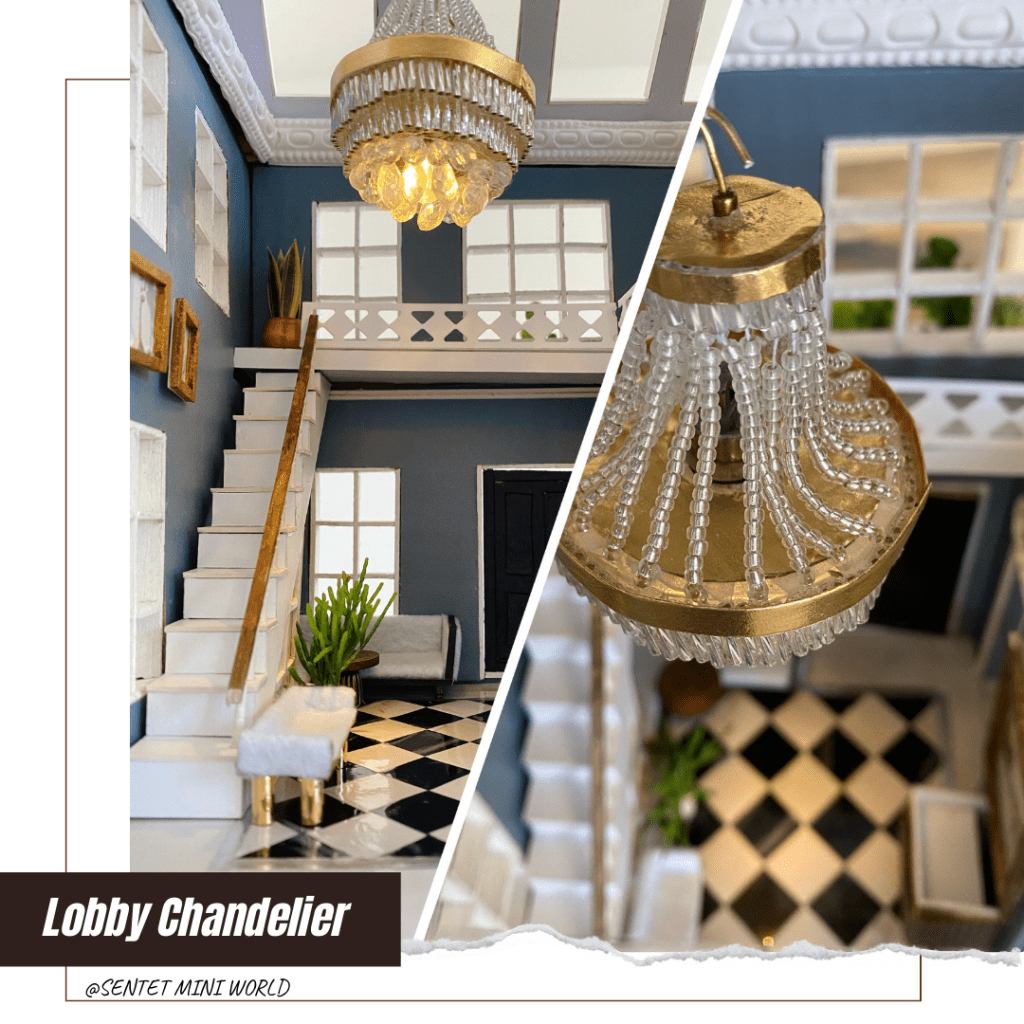
The Grand Reveal: From Dream to Dollhouse Reality
There’s no denying the transformation! The moment I hung this miniature chandelier in the dollhouse lobby, the entire atmosphere shifted. It became a sparkling centerpiece, adding a touch of luxury and vintage charm. Be sure to check out the video tutorial and photos on my YouTube channel and Instagram for a closer look at the finished product!

Leave a comment