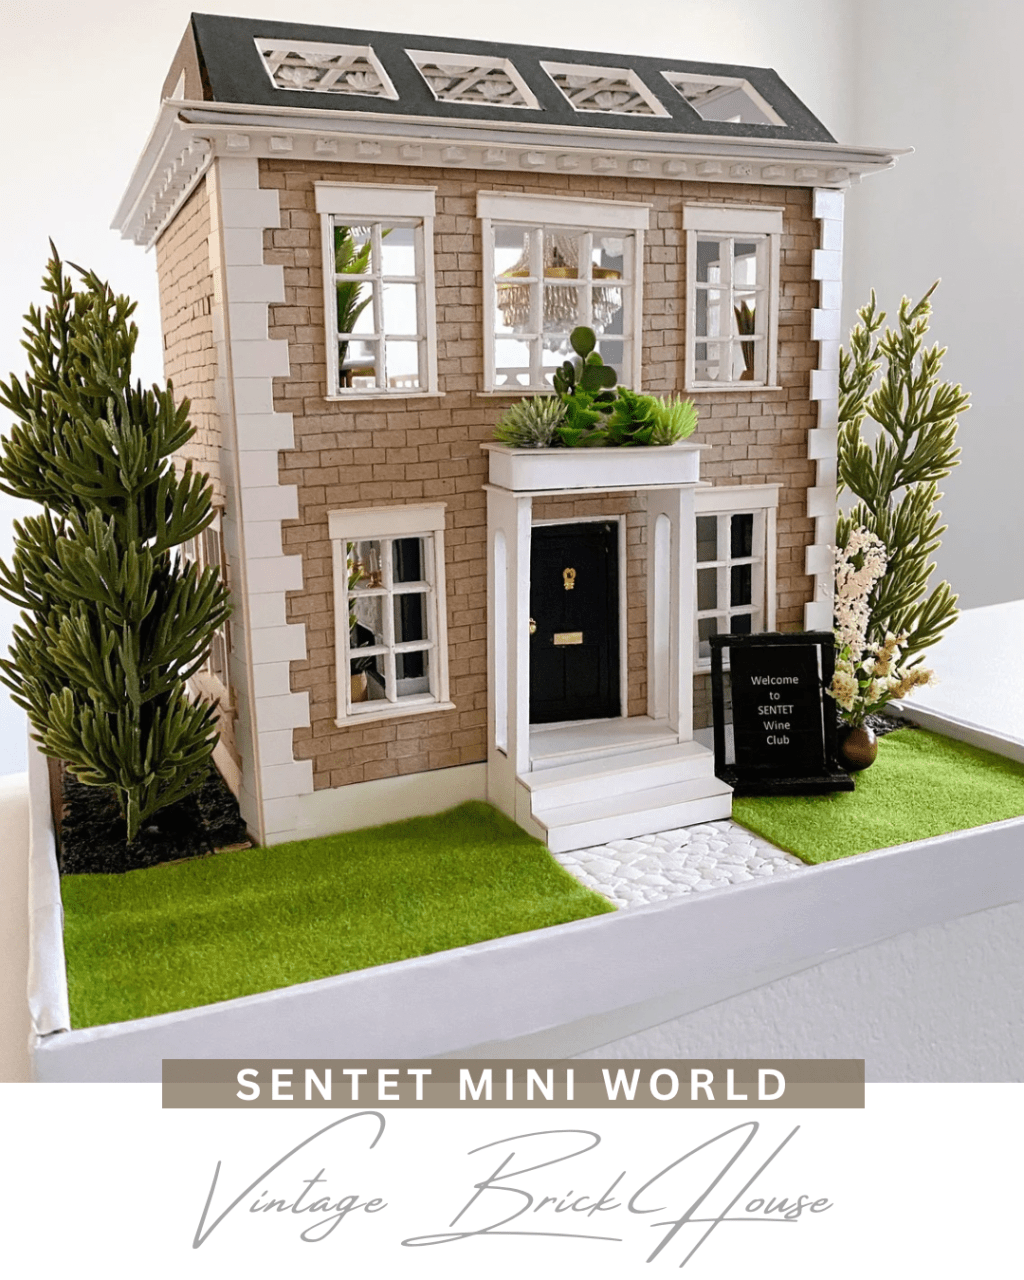
I’m thrilled to announce that I’ve finally completed this Vintage-style dollhouse! The house structure and decoration were definitely challenging, but I’m so happy and surprised to see it come to life.
If you follow me on Instagram, you’ve seen my weekly updates on the build process. The full video tutorial will be available on YouTube soon!
What You’ll Learn in This Dollhouse Build:
- Building a two-story structure in 1/36 scale (and making it disassemblable!)
- Creating realistic brick walls using recycled cookie boxes (a budget-friendly option!)
- Constructing miniature stairs (a first attempt for me!)
- Making a stunning crystal-style pendant
- Crafting a fireplace with clay decorations
Building with Recycled Materials:
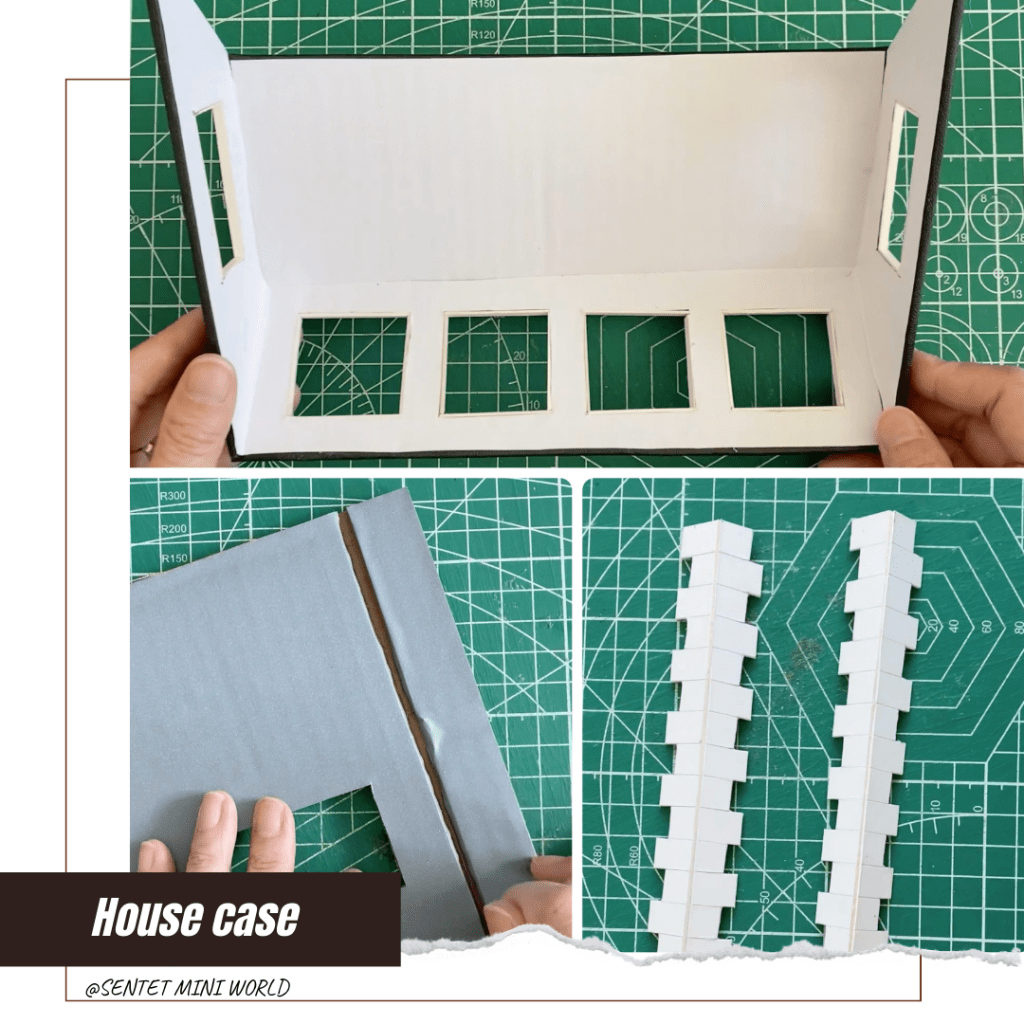
The dollhouse is built from a regular cardboard box (think repurposed Amazon boxes!). I wrapped the box in wallpaper and then began decorating. To allow for disassembly (easier storage!), I left small spaces on the walls for the floors to slide in, eliminating the need for glue.
Here are two additional tips for creating a sturdy and visually appealing structure:
- Corner Brick Bars: White brick bars were added to the corners for better connection between walls (see picture for reference).
- Roof Crown: A roof crown connects the three top walls, preventing them from falling apart
Creative Brick Walls:
I explored many brick-making video tutorials, but ultimately decided to cut up cookie boxes and adhere them to the walls. This budget-friendly approach achieved a great look! Next time, I’d like to try creating a brick wall using foam.
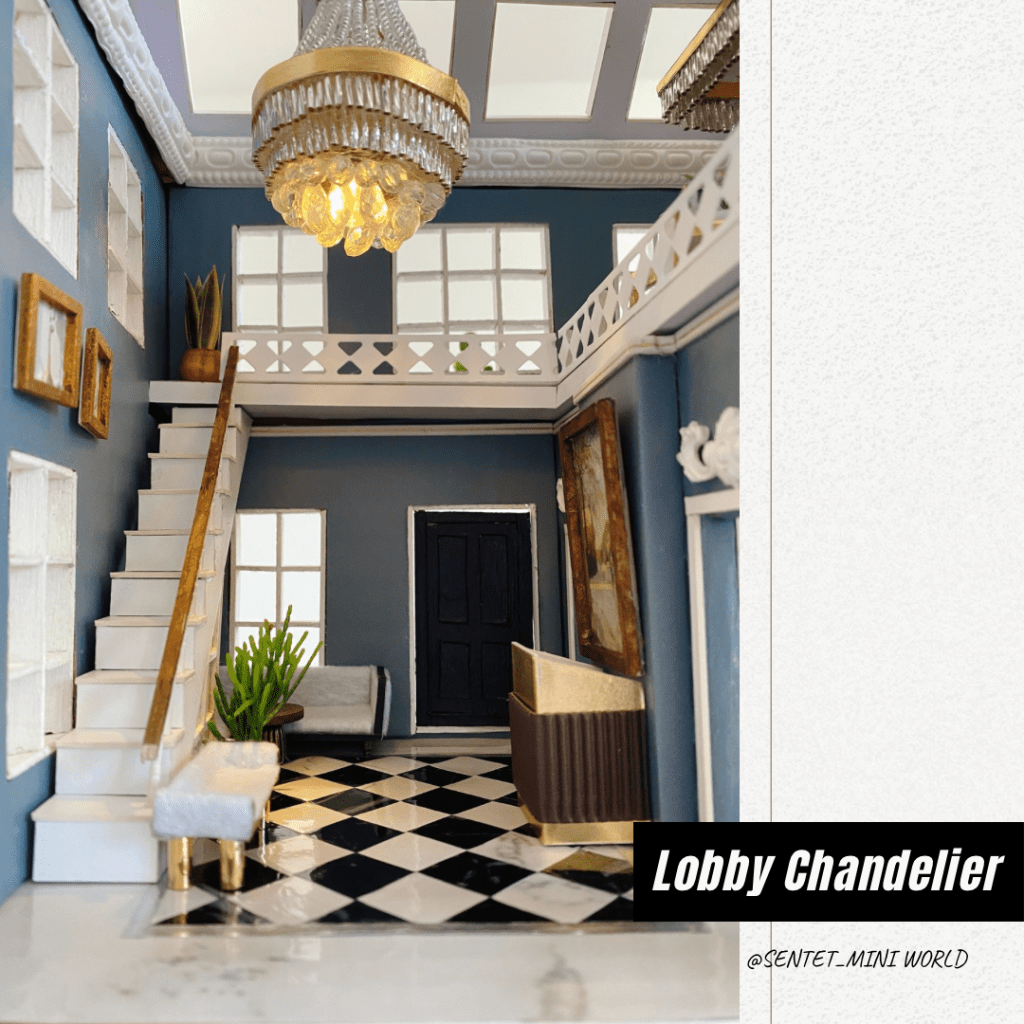
Stairway to Heaven (Almost!):
Building the stairs was an adventure! The most challenging part was installing the handrail (a bit trickier than anticipated). Despite some initial difficulties in visualizing the structure, the final result turned out well. I especially love the grid pattern at the stair base.
Sparkling Chandelier:
The crystal chandelier is a showstopper! Beads were used to create both rectangular and round pendants with a neat finish. To allow the lower beads to move freely, I “sewed” them together instead of using glue. This added some difficulty, but the final effect is worth it! The curved top section was a challenge due to using thread instead of wire. Thin wire would definitely provide more control over the shape in the future.
Fireplace with Flair (Details in Separate Post):
The wired lighting used in the fireplace was covered in a separate article. However, I wanted to mention the tiny wired LED light bulbs – a game-changer! These allow for crafting miniature wall lights, candle lighting effects, and more. A 3-branch candle holder might be a future project!
Key Tools & Materials (Amazon link included):
1. Silicon mold: https://a.co/d/023D8S8I
2. Beads for Pendant:https://a.co/d/07kHspoH
3. Clay brand (for fireplace): https://a.co/d/0fEtTnCg
4. Washi Tape: https://a.co/d/0cB8hhK9
5. Wall paper: https://a.co/d/0g804BBg
There’s always room for improvement, and this project has inspired me to build another antique-style dollhouse in the future, perhaps with a different design. This project completely fulfilled my vision for a vintage-style house. Now, it’s on to exploring modern styles and maybe even a larger scale! See you next time!

Leave a comment